
Projects
A project brings together the plans, viewpoints, photos and reports for one job site or inspection.
Creating a project
Section titled “Creating a project”- From the project list, tap New project.
- Enter a name, for example “Villa Les Ormes”.
- Add a description if you want. It is visible to your team.
- Tap Create project.
Joining a project
Section titled “Joining a project”The Join a project button is for when someone has shared an invitation code with you rather than a link. Enter the code and you join the project.
If you received a link, just open it: it takes you straight to the project. See Invite collaborators.
Inside a project
Section titled “Inside a project”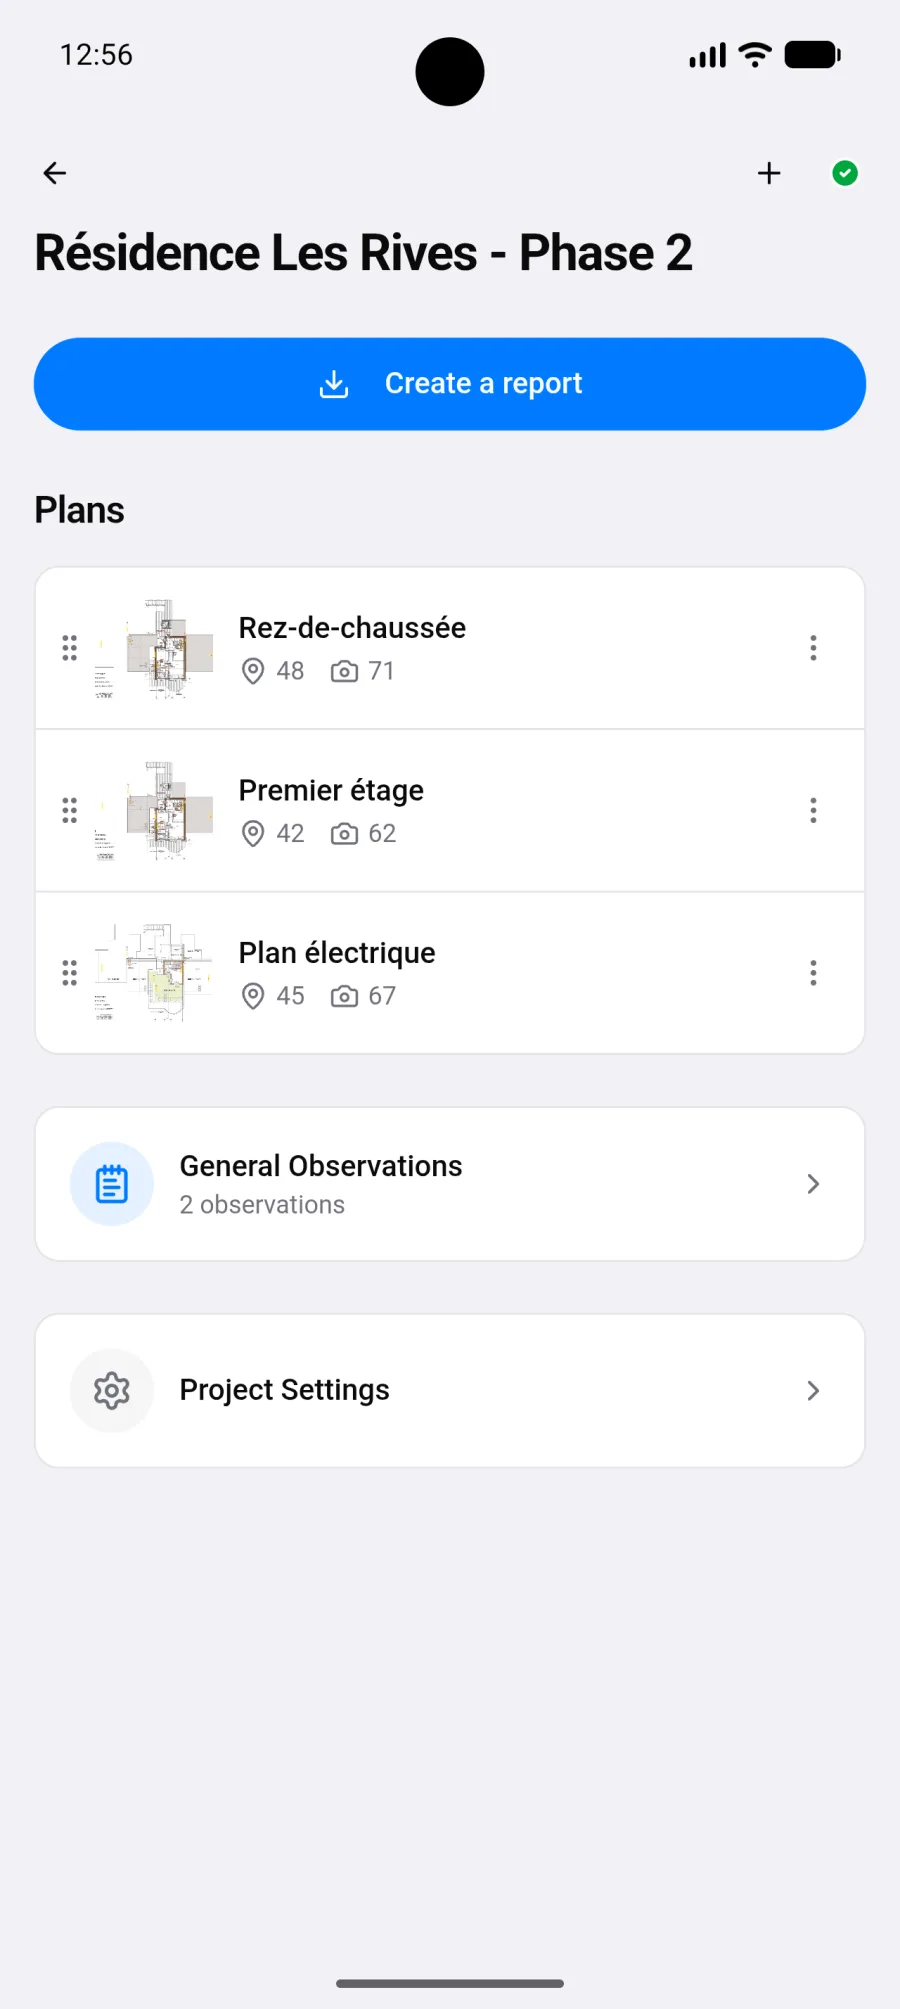
The project screen shows:
- A statistics bar: plans, viewpoints and photos.
- The plans grid, each with its annotation and photo counts.
- General observations, for anything not tied to a plan.
- The list of members.
- The project information and its dates.
Tap a plan to open it in the plan viewer.
Project settings
Section titled “Project settings”The Project settings button gathers everything that is set per project.
Properties
Section titled “Properties”The project name and information. The information field is for what applies to the whole project: visit date, purpose, remarks.
Cover photo
Section titled “Cover photo”Add a cover so you recognise the project in the list. On Android you can take it with the camera directly, or pick it from the gallery.
It only ever appears in your project list, never in reports.
Colours
Section titled “Colours”Rename the default colours for this project, hide the ones you do not use, and choose the default colour for new viewpoints.
With a Pro or Teams subscription, add custom colours, shared with everyone on the project.
Offline availability
Section titled “Offline availability”The setting to prepare before heading to a site with no coverage. See Offline mode.
Collaboration
Section titled “Collaboration”Invite collaborators and manage members. This is also where you mute notifications for this project without touching the others.
See Invite collaborators.
Danger zone
Section titled “Danger zone”Delete project removes it permanently after 30 days. During that window it can still be restored from the iOS app.
If the project is not yours, the action becomes Leave project. The owner can invite you back.