
Annotations
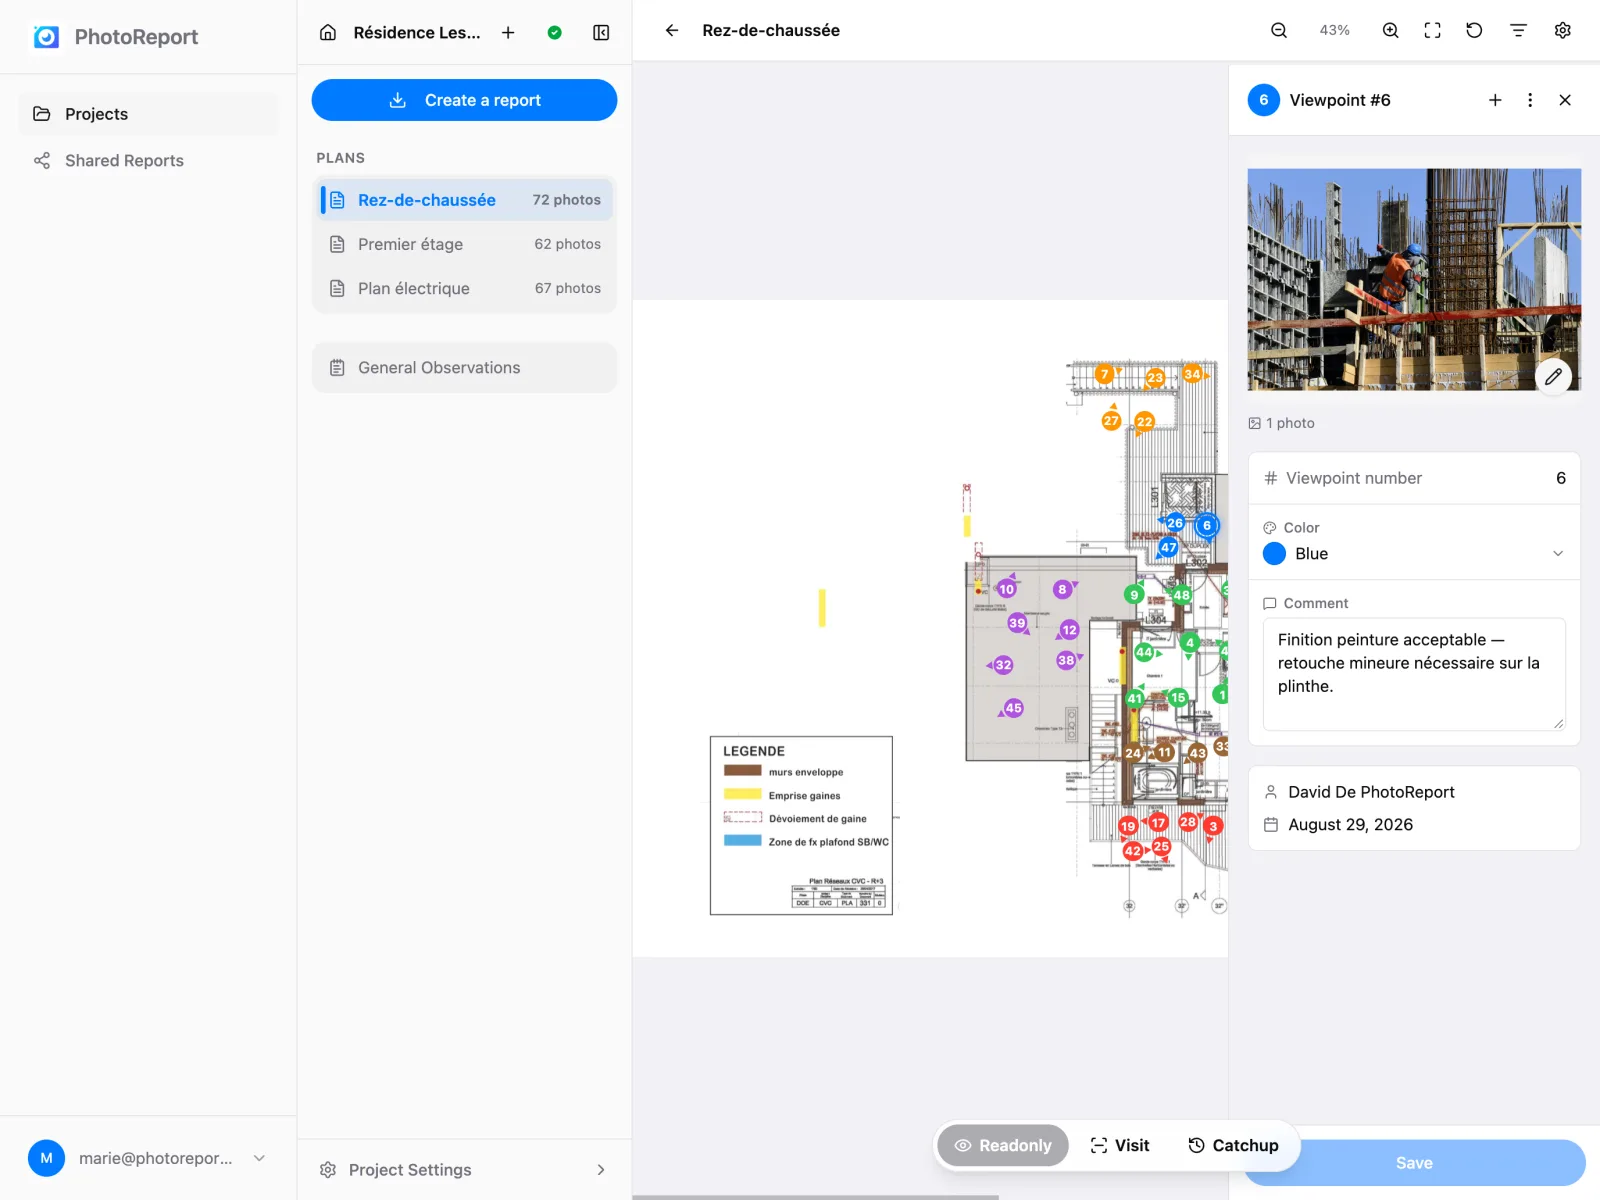
An annotation, called a viewpoint in the interface, is a numbered marker placed on a plan. It is the container for everything else: the comment, the photos, the videos and the audio comment.
Creating a viewpoint
Section titled “Creating a viewpoint”- Put the plan in Visit mode.
- Click the plan where you want it. The viewpoint is created and its panel opens.
- Drag around the marker to give it a viewing direction, if that is useful.
- Type the comment, then add your media.
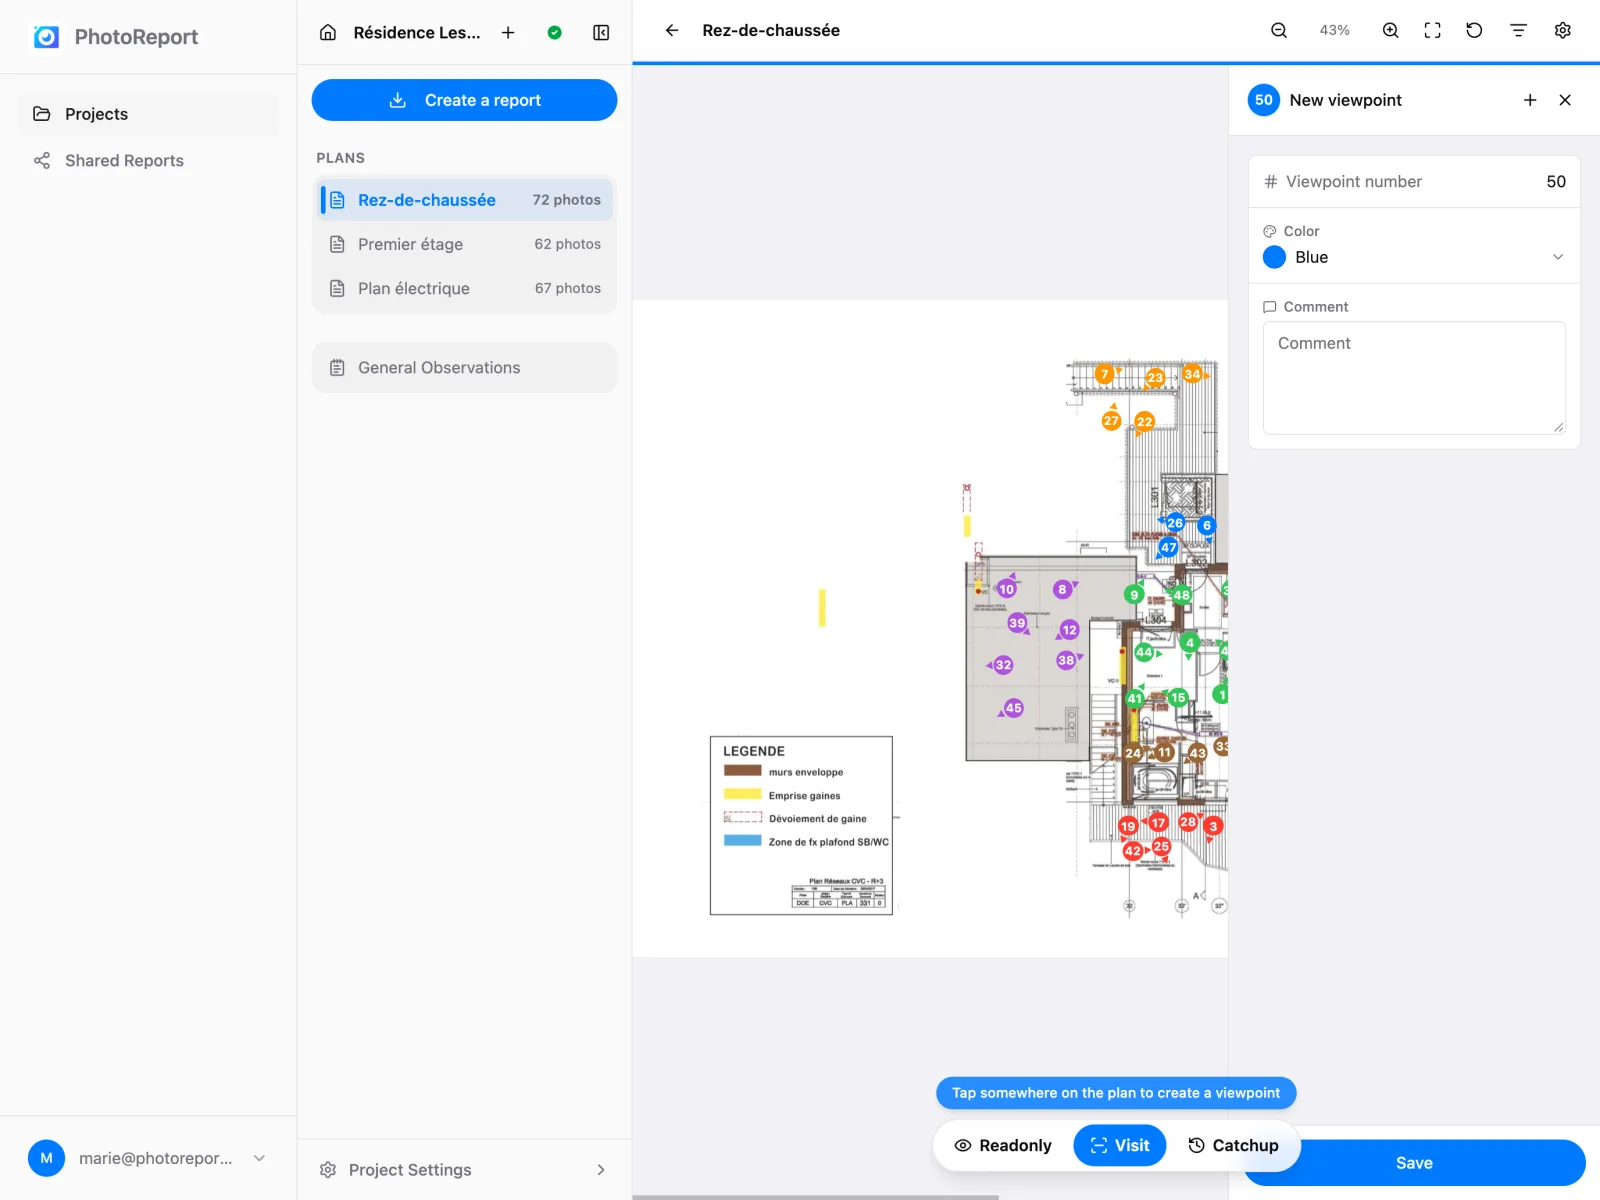
You can also use the Add a viewpoint button, which puts the plan into a waiting-for-click state. The Esc key cancels.
Numbers are assigned automatically in creation order. To flatten them out again, see Renumber points in the plan settings.
The detail panel
Section titled “The detail panel”Clicking a marker opens its panel on the side. It contains:
- The number and the colour of the viewpoint.
- The author and the creation date, plus whoever last modified it.
- The comment, editable directly.
- The viewing direction.
- The media gallery: photos, videos and audio comment.
Colour and direction
Section titled “Colour and direction”- Colour: choose from the project’s default colours or its custom colours. Default uses the colour set for the plan or the project.
- Direction: drag around the marker to orient the triangle. No direction removes the triangle and leaves only the circle.
Use colour as a code: one trade per colour, or one urgency level per colour. The viewer’s colour filter and the export’s rely on it.
Adding media
Section titled “Adding media”From the panel:
- Add photos: select one or more image files.
- Add a video: the
.mp4format plays everywhere. - Add audio: see Audio comments.
See Photos and videos for rotation, properties and deletion.
Moving and deleting
Section titled “Moving and deleting”- Move this viewpoint: repositions the marker on the plan.
- Delete this viewpoint: removes the marker from the plan, keeping its photos in the project.
- Delete this viewpoint and all its photos: removes everything.
Upload tracking
Section titled “Upload tracking”When you add media, each item shows its state: queued, uploading, failed. A failed item offers Retry, and a Retry all button picks up the whole set.
If you try to leave the page while uploads are running, the browser asks for confirmation.